How To Load A Kayak Onto A J-Rack by Yourself?
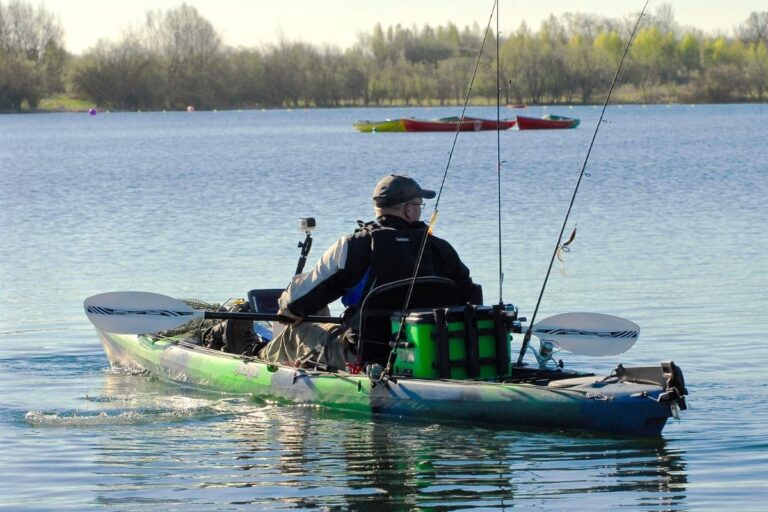
Most people tend to use their own vehicles to transport their kayaks.
Using a J-Rack roof rack system is one of the safest and easiest ways to transport a kayak that won’t fit inside your vehicle.
There are a few different methods for loading a kayak onto a J-Rack, including the hood slide method, the shoulder press method, and lifting with your legs. You must ensure that you’re strong enough to lift the kayak safely, without risking injury to yourself or others. You can load the kayak from your vehicle’s side, front, or rear, depending on what is easiest for you.
If you don’t have the luxury of a large car or nearby paddling spots, a J-Rack is a crucial piece of equipment to help with your kayak transport.
A J-Rack is a set of racks shaped like the letter “J” – this rack cradles your kayak on top of your vehicle to help you transport it quickly and safely to water.
J-Racks work effectively on almost any vehicle, from large SUVs to small cars.
There are alternative ways to transport a kayak, such as in a truck bed – however, for carrying more than one kayak and to ensure the safe transport of any kayak, J-Racks are the most secure rack option.
Most J-racks come with a locking mechanism that secures them to the racks on your vehicle’s roof or the top of your truck’s cab.
On a large vehicle, you may even be able to install two racks so that you can transport two kayaks with one vehicle.
One of the most critical rack installation tips is this: If you’re using two J-Racks, make sure that the J curve of the racks faces towards the opposite side of the vehicle.
Loading your kayak onto a J-Rack without help from someone else can be a real challenge, so we’ll explore how to do that in this article.
How Can I Load A Kayak Onto A J-Rack By Myself?
Let’s explore the best methods for loading a kayak onto a J-Rack without a second pair of hands.
There are a few different approaches, so it’s a good idea to try each one out and see which one seems most feasible and effective for you.
Remember that loading your kayak onto the J-Rack is not the whole challenge – you’ll need to use at least one additional tool (cam straps) to secure it once it’s in place.
Work from the side of the vehicle to double-check that the straps are secure around the kayak (or kayaks) and roof rack before driving off.
Rear Loading
Loading your kayak onto the J-Racks from the vehicle’s rear works well if you’re a solo paddler and your kayak is reasonably short and light.
However, we suggest the side-loading method if your kayak is long, although rear loading may also work.
Start by ensuring that the J-shaped racks have been attached following proper installation techniques so that they’re very secure on your vehicle’s roof – it’s easier to do this before you put the kayak on the racks, which will prevent accidents.
Step One: Place your kayak directly in line with the back of the vehicle’s bumper, perpendicular to the bumper, so that it will end up approximately in the middle when you load it.
Step Two: Place paddles underneath the kayak’s stern on the ground to prevent it from being damaged when you slide it.
Step Three: Carefully lift the kayak bow until it’s in line with the J-cradle of the J-Rack, and then begin to slide it into place and rest it on the racks.
Careful positioning at this stage will reduce your risk of damaging the racks and kayak because it should slot into the correct place.
Make sure your kayak is secured with straps before moving onto the next step, or the bow may fall out and crash onto your vehicle or down to the ground.
Step Four: Leverage the bow against the J-Rack to lift the other end (the stern) of the kayak upward, minimizing the strain on yourself and your boat.
Step Five: Slide the kayak forward and adjust it as necessary, setting the gunwale in the appropriate channel on the J-Rack.
Use cam straps to secure the kayak into the correct position, and ensure that the rack keeps it immobilized.
You want to ensure that your kayak isn’t in any danger of slipping and falling off the vehicle while driving, as this is very dangerous.
Take a moment to use the straps to secure the kayak to the J-Rack and the existing crossbars on top of your vehicle.
Note that if your kayak is long, you may need to work from the side of the vehicle in addition to the rear – this should give you more maneuvering space and the ability to apply more force.
Side Loading
Note that this method is pretty challenging, especially with a heavy kayak, and is both safer and easier with a partner.
It can, however, be done alone if you’re strong, tall, and have a smaller vehicle.
Step One: Start by standing next to your kayak, in the middle of the boat (length-wise), and bend down.
Be sure to use the proper lifting technique (to be discussed shortly), so you don’t hurt your back.
Step Two: Rotate your kayak a little to the side so that the kayak’s gunwale will slot into the proper place on the J-Rack – then lift the boat onto the roof rack.
It may be easiest to set one end of the kayak into the J-cradles first, and then move along the boat to the other end so you can swing it into position.
Step Three: Once your kayak is on the J-Rack, make sure it’s strapped down securely.
The kayak needs to be held in place firmly so it won’t be at risk of falling off before moving your vehicle.
The Shoulder Press Approach
The shoulder press approach is ideal if you struggle to lift your kayak and need to be especially careful of injuring your back.
Step One: Position the kayak so that the bottom of the hull faces upward.
Place something soft on the ground under the kayak’s bow to protect it from damage, like a blanket or rug.
Step Two: Stand behind the kayak and lift it up so that it’s standing vertically, with the bow against the ground.
Step Three: Slowly work your way down, so your hands are near the center of the kayak, close to the seat – this should be approximately where the kayak’s balance point is.
Step Four: Slowly lift the kayak and allow it to balance.
Next, lower the edge onto your shoulder, so your head is near the kayak’s opening, and the kayak rests across your shoulder.
You’ve picked it up, so you shouldn’t have to lift it with your back.
Step Five: Walk toward your vehicle and execute a shoulder press to lift the kayak easily over your head and onto the J-Rack.
Check that the boat is firmly secured to the J-cradle rack with at least two straps before driving anywhere.
The Hood Slide Option
Those who struggle to lift may find this method to be more manageable and straightforward, but you also risk damaging your car with this option.
Although this technique is probably the safest for your back, your vehicle should be fine if you have a good, thick towel to protect the vehicle as well.
Step One: Spread a towel or blanket across your windshield and top of your vehicle to protect your paint job and glass from being scraped by the kayak – the fabric needs to come up to the edge of the J-Rack.
Step Two: Position the kayak on the ground in front of the car.
Lifting with your legs, ease the end of the kayak onto the towel, and then push it up the hood towards the J-Rack.
The kayak should slide reasonably easily upward onto the roof.
Go slowly so you can pause and adjust the towel if necessary to protect the paint.
Step Three: Wriggle the kayak onto the J-cradle rack, and make sure it’s secure, as with all other loading methods.
For vehicles on the taller side, this method of loading a kayak (or multiple kayaks) onto the J-Rack is much easier on your back.
Top Lifting Techniques
Kayaks are heavy, and even if you know the right approach to take, loading a kayak on a J-Rack quickly and safely with any method can be a challenge, particularly for smaller paddlers.
You also need to keep in mind that when you’re lifting a kayak onto the J-Rack, you always need to be careful – nobody wants a back injury!
Here are some tips to help you load your kayak safely onto J-Racks every time.
Tip One: Practice With A Partner

Maneuvering your kayak into position on a J-Rack can be tricky until you get the hang of it.
This task gets increasingly easier once you become more familiar with the exact angles and approach.
It’s a good idea to start by practicing your lifting method with another person, if possible.
This will allow you to focus on learning how to angle and load your kayak onto the J-Racks, rather than having to focus primarily on managing the boat’s weight.
Also, loading a kayak with two people is much easier than doing it alone, so this will help you learn the motions before adding the difficulty of lifting the kayak independently.
Tip Two: Be Mindful Of Your Back
It’s essential to always protect your back when lifting a kayak.
Even a light kayak is a relatively heavy object, and many kayaks are not designed to be lightweight.
This it’s why it’s crucial that you follow proper lifting procedures any time you lift your kayak onto J-Racks on the roof of your car.
For ensured back safety, start by crouching next to your kayak, and keep your back straight with your knees bent.
Then, take hold of the kayak and begin to lift using just your legs.
Your back should not bend while you lift – try to keep it as straight as possible.
Take your time and go slowly, so your knees take the bulk of the weight, and keep lifting until the kayak is above your head.
Your legs contain the strongest muscles in your body, so it’s essential to always use them when lifting anything heavy!
Even if you don’t typically suffer from back problems, you should always still exercise caution when lifting heavy objects.
If you don’t learn and practice the proper lifting techniques, it can be very easy to do permanent damage when lifting your kayak onto a vehicle.
Tip Three: Go Slowly

When lifting or carrying anything heavy, don’t rush – otherwise, you will make mistakes and either hurt yourself, or drop and damage your kayak.
You might feel eager or impatient to get out on the water or get home, but it’s so important to take your time lifting and moving something as large and cumbersome as a kayak.
This is particularly crucial with a new boat or rack.
Give yourself adequate time to get used to each kayak’s and rack’s angles as you practice the right approach for loading and unloading.
Conclusion
You can load a kayak onto a J-Rack with just one person, but it isn’t easy.
Before attempting this task alone, be sure to practice the proper technique with help.
Lift with your legs and try loading your kayak from the back or over the hood for the most accessible approach.
Table of Contents